


These creative projects are fun for kids of all ages. That means you may want to get in on the fun, too! You probably already have all or most of the supplies you’ll need at home, which makes these three creative projects easy on the wallet.
Personalized Upcycled Storage
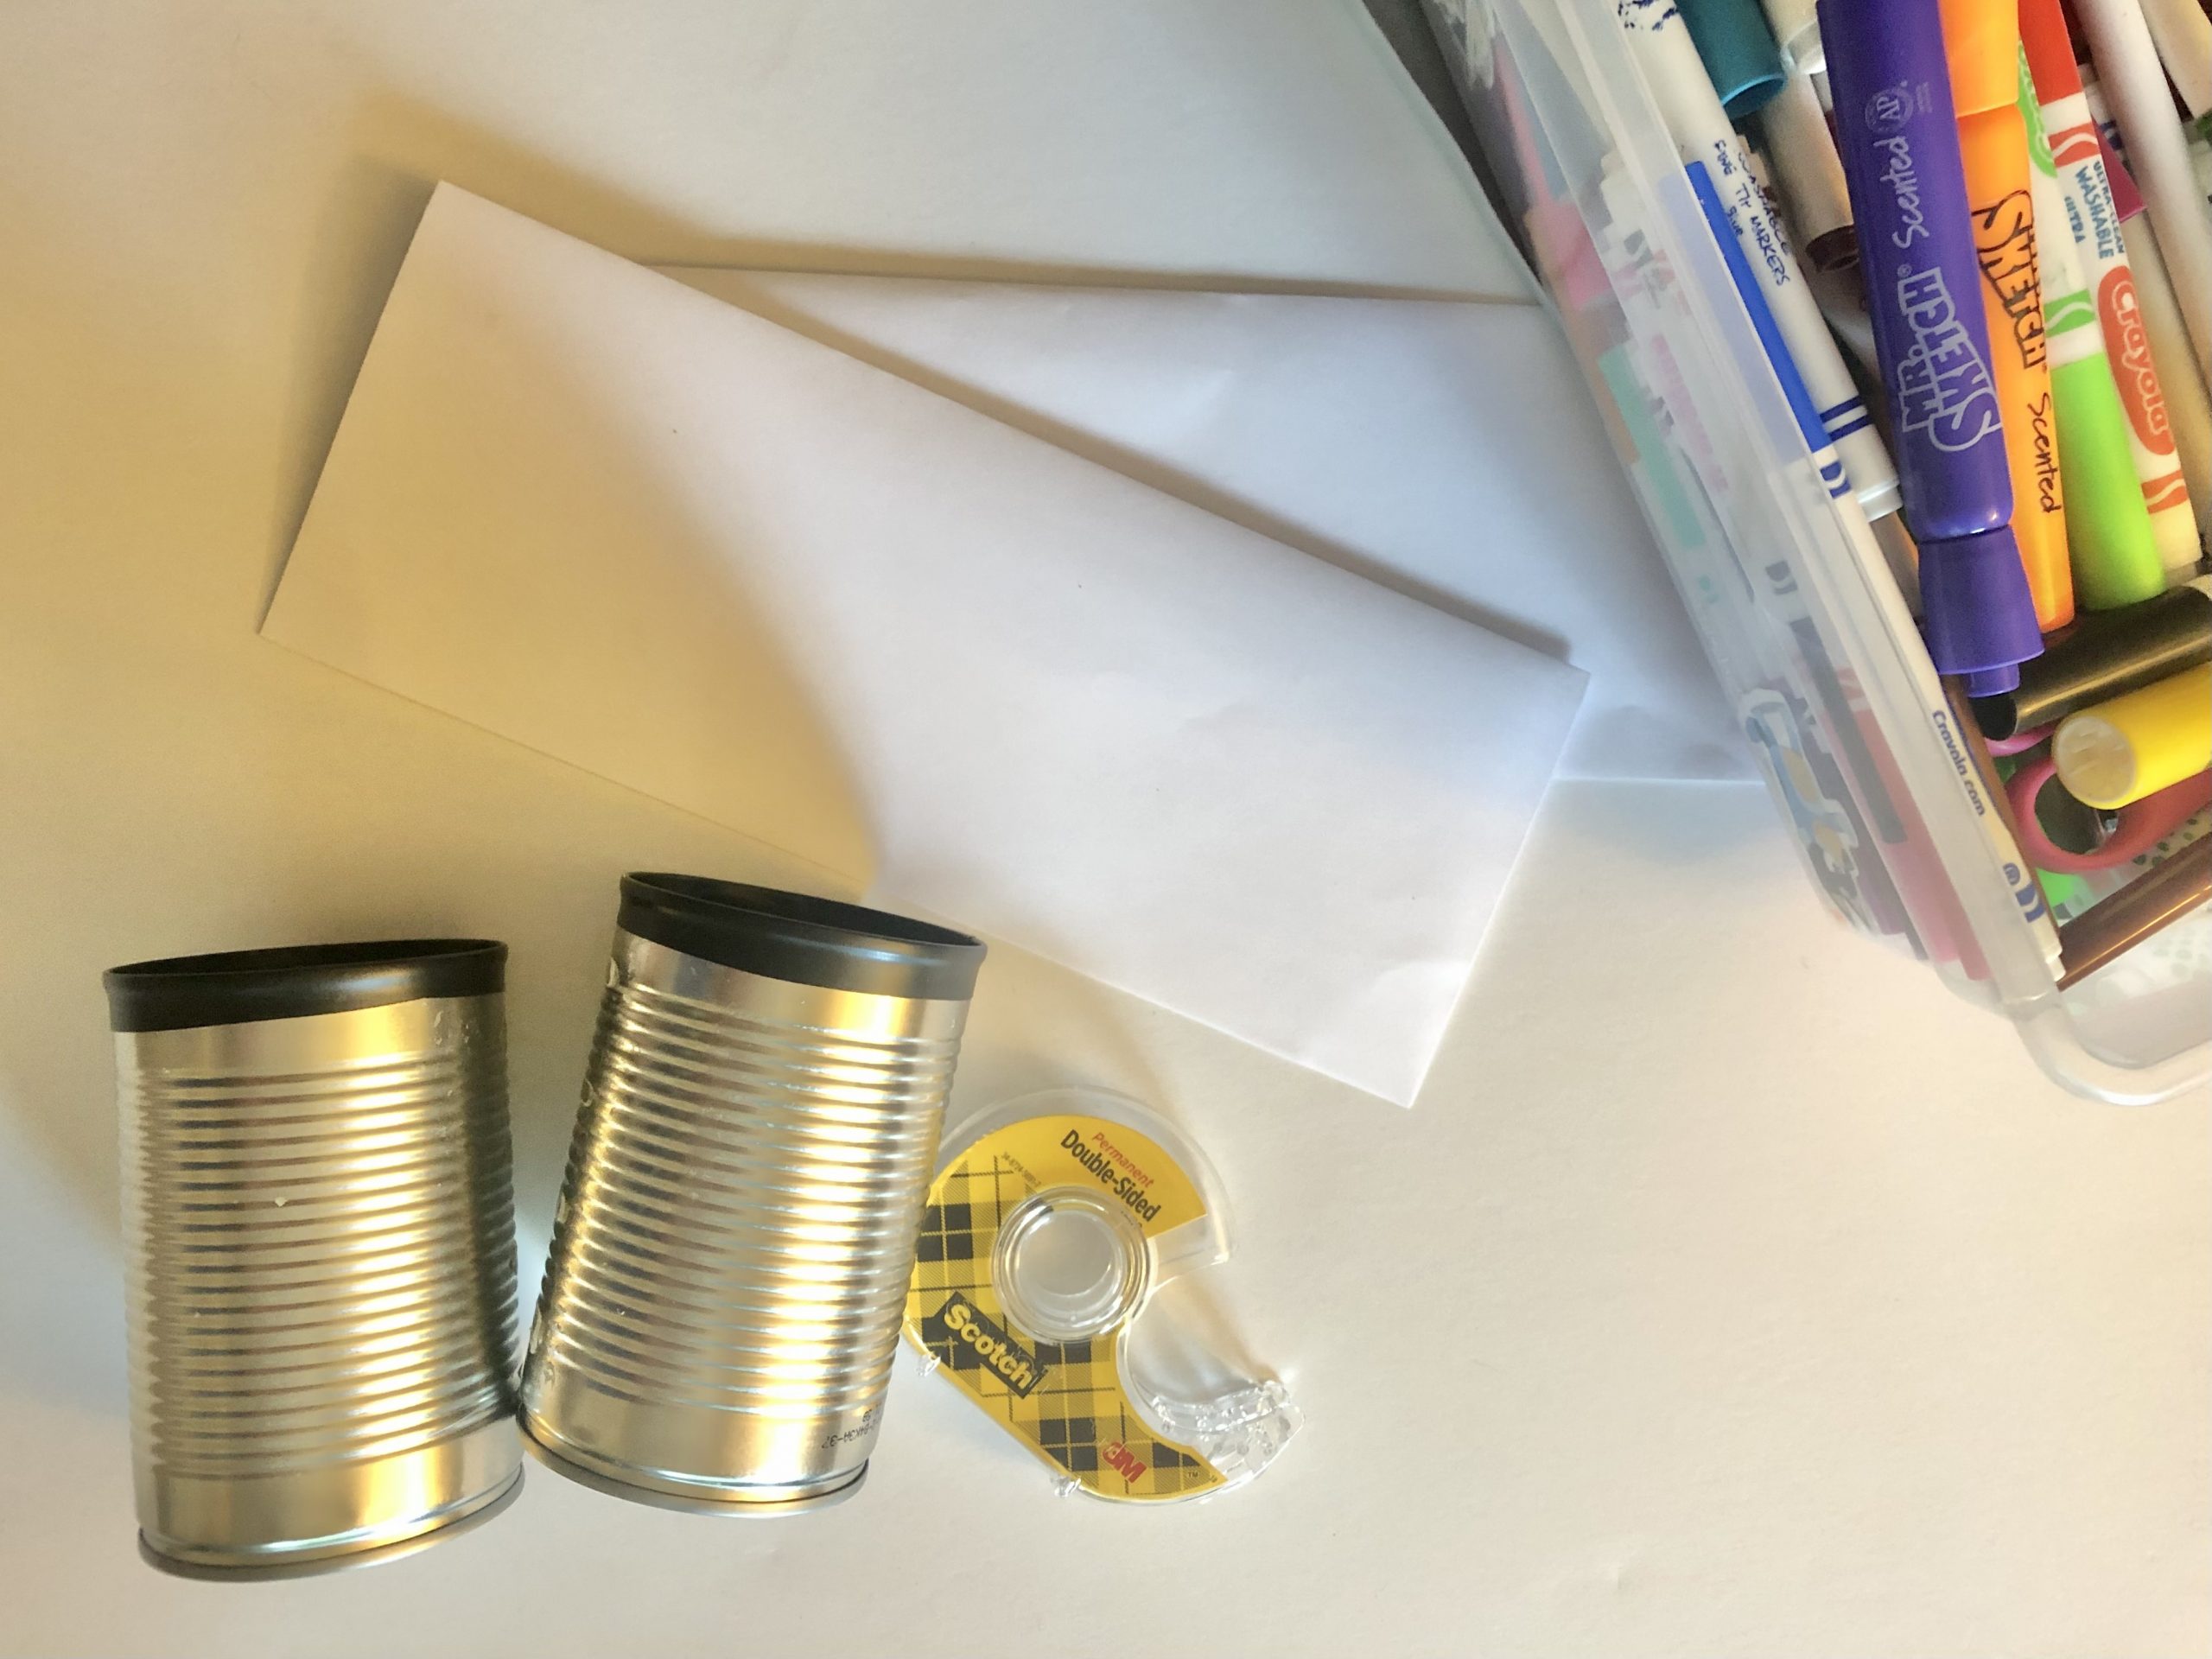

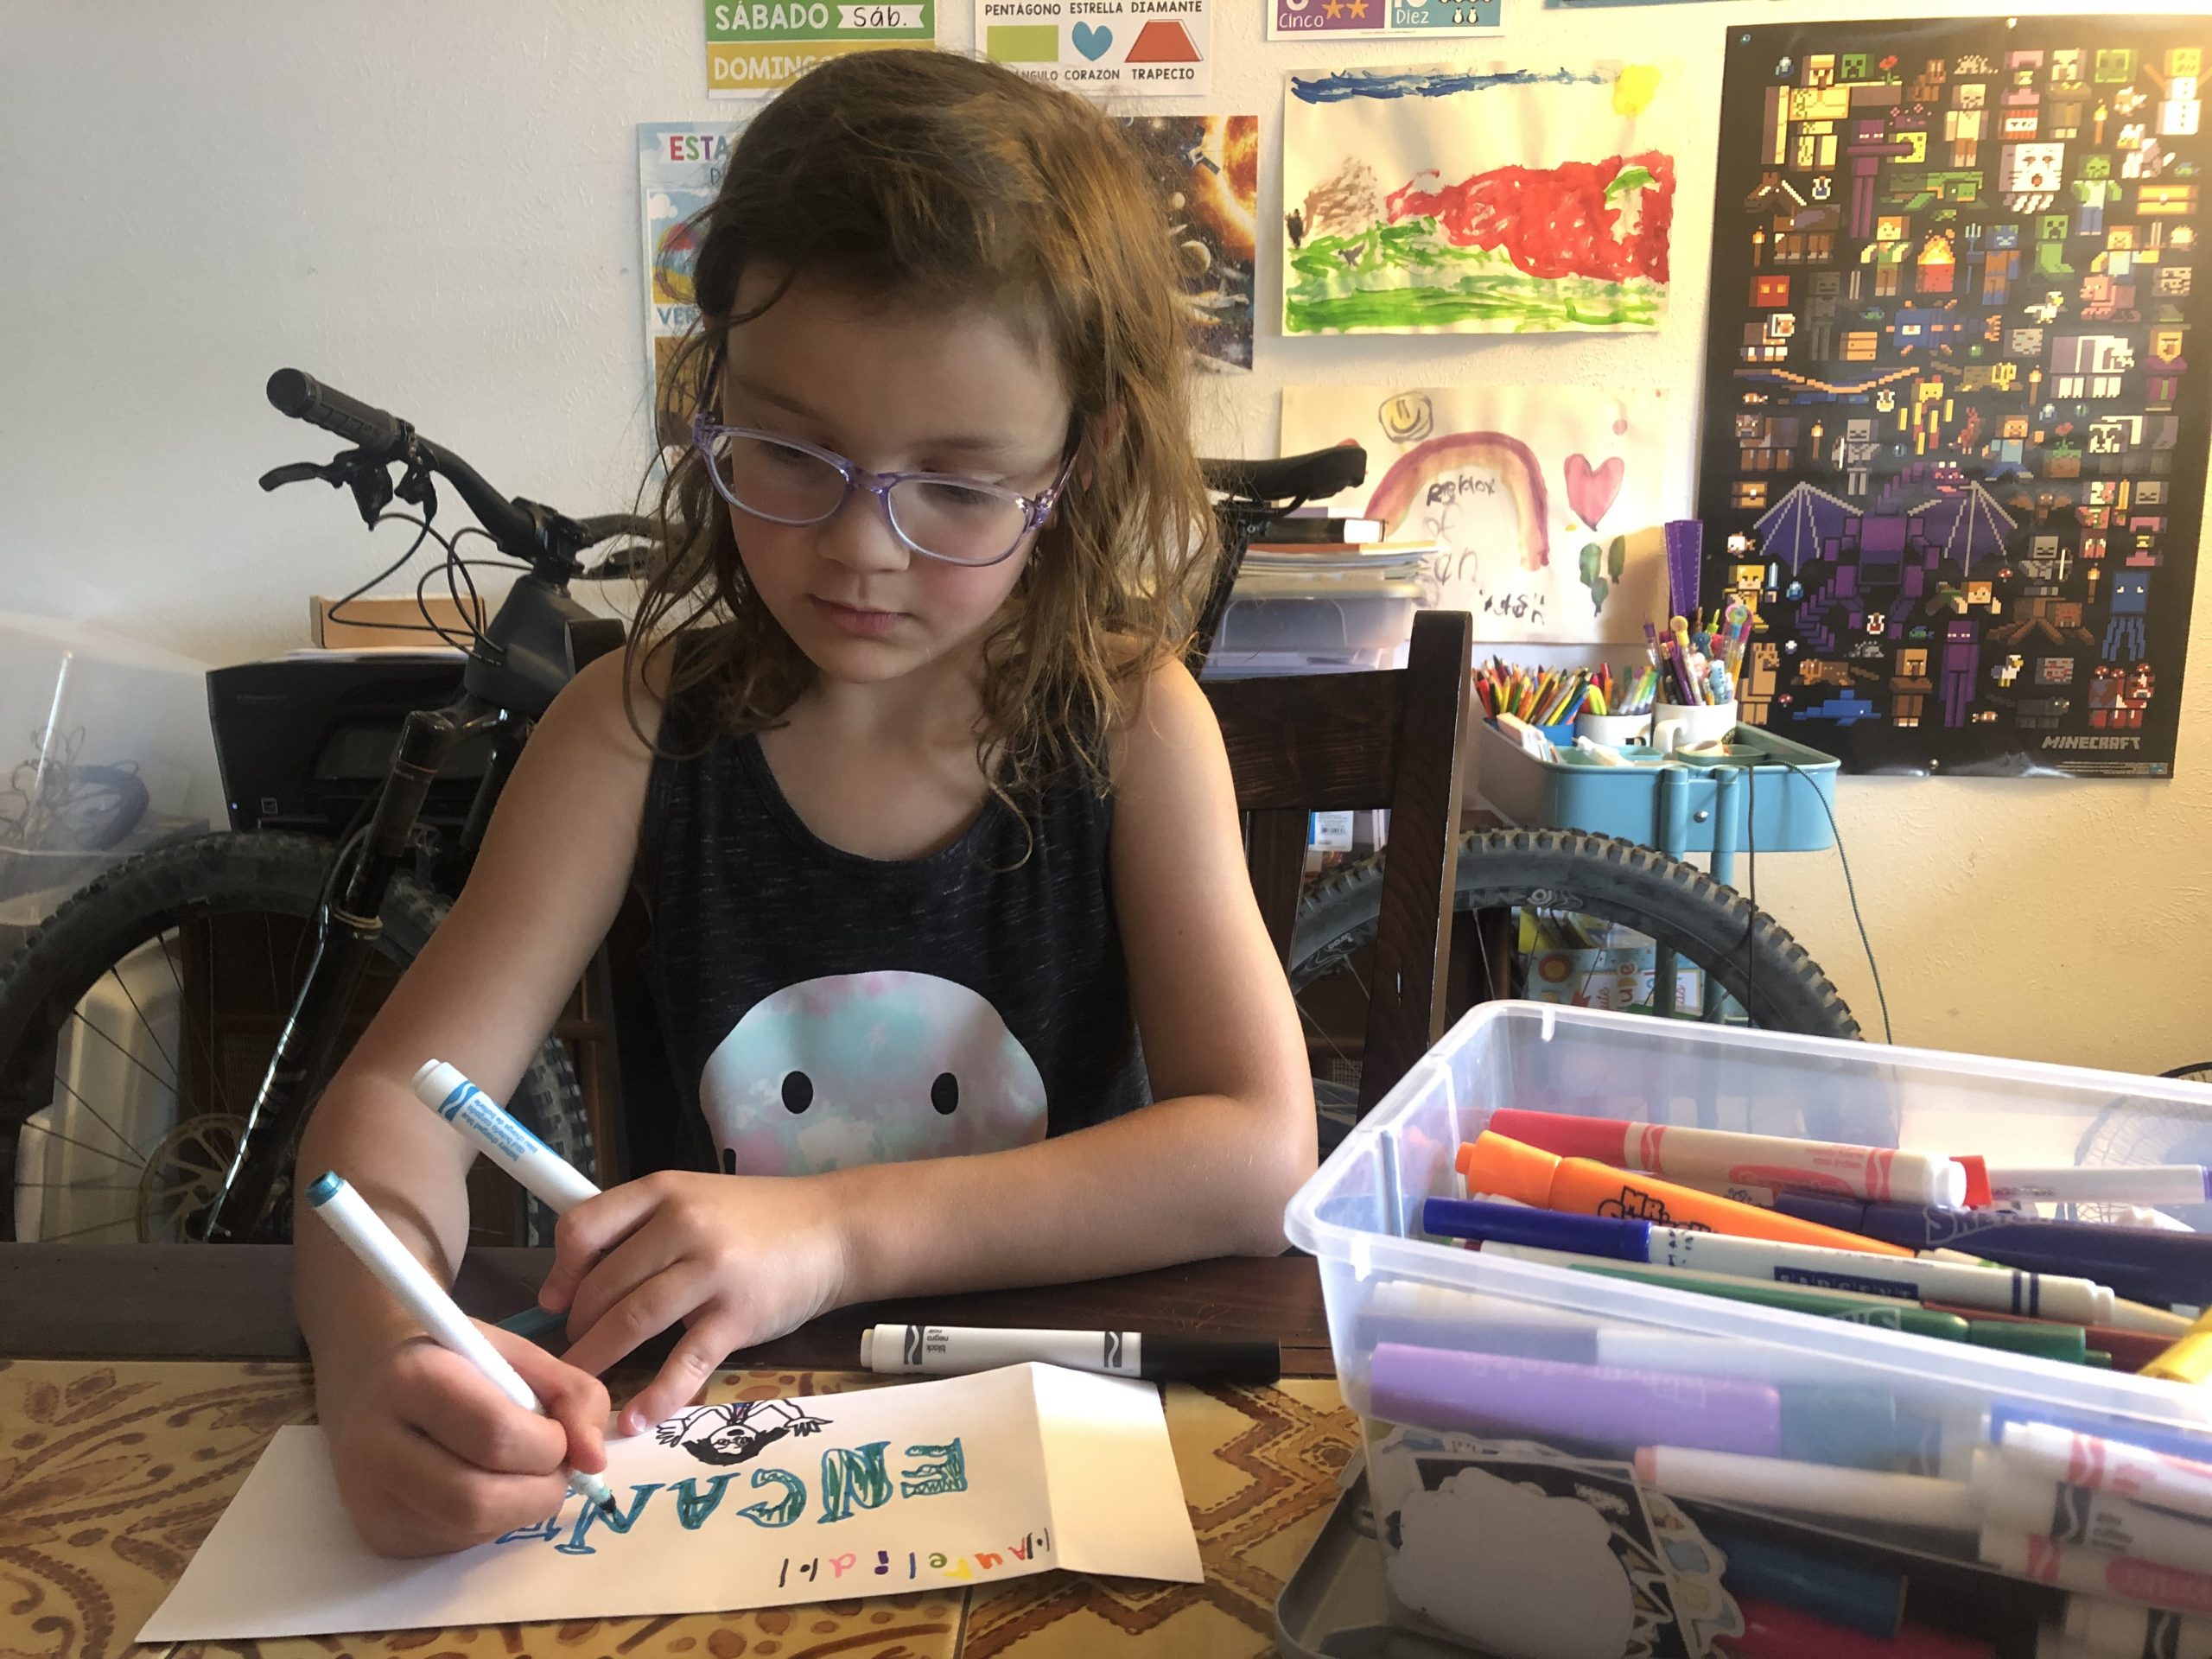
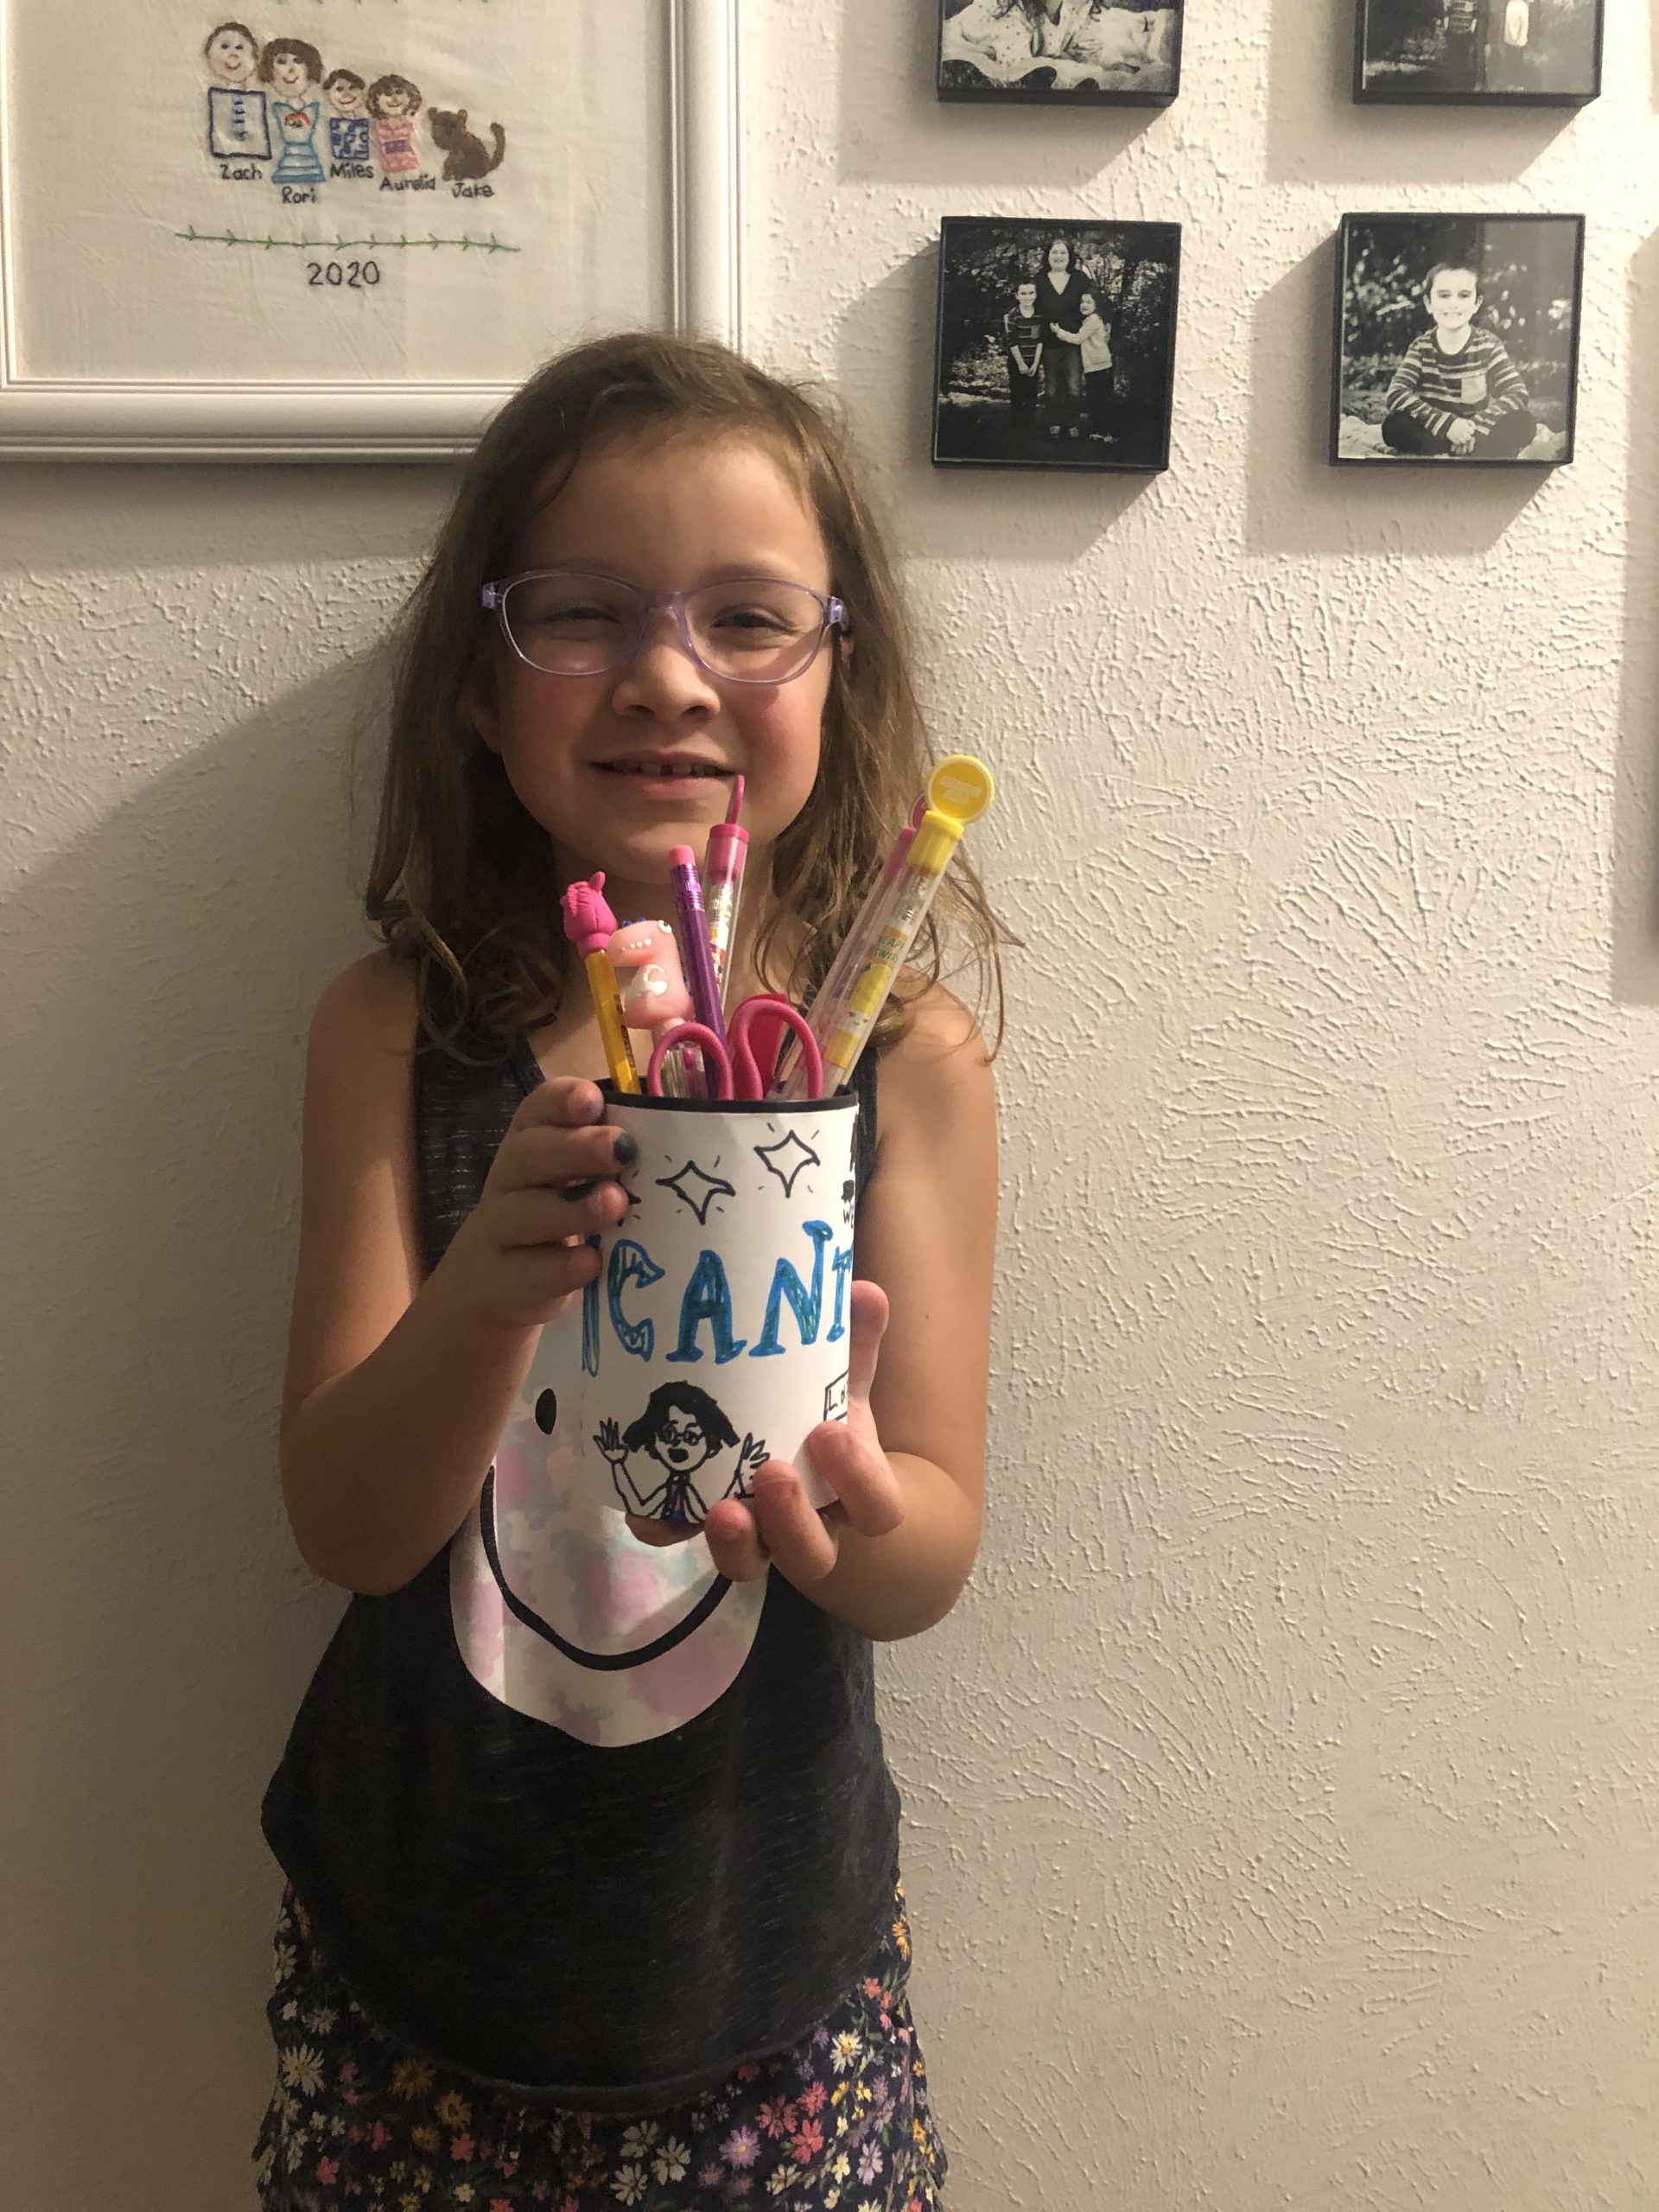
We reuse a lot of containers at our house. We reuse ice cream containers as planters. We clean out Lipton jars and candle jars and reuse them as containers for cotton swabs, bandages, and office supplies. I wanted the kids to have containers for their colored pencils that wouldn’t shatter if dropped.
Supplies
- clean food cans with labels removed
- scissors
- electrical tape
- printer paper (or patterned paper if preferred)
- double-sided tape
Optional Supplies
- stickers
- paint
- markers
- crayons
- photographs
Directions
Save and carefully clean food cans. After removing the lid, there will be sharp points inside. I used pliers to press these down and then carefully covered the rim with electrical tape.
Fold a sheet of copy paper lengthwise. Place double-sided tape inside the folded ends to keep them closed. Decorate and personalize the paper, leaving a couple inches at one end blank. Use that blank space to secure the new “label” with your double-sided tape.
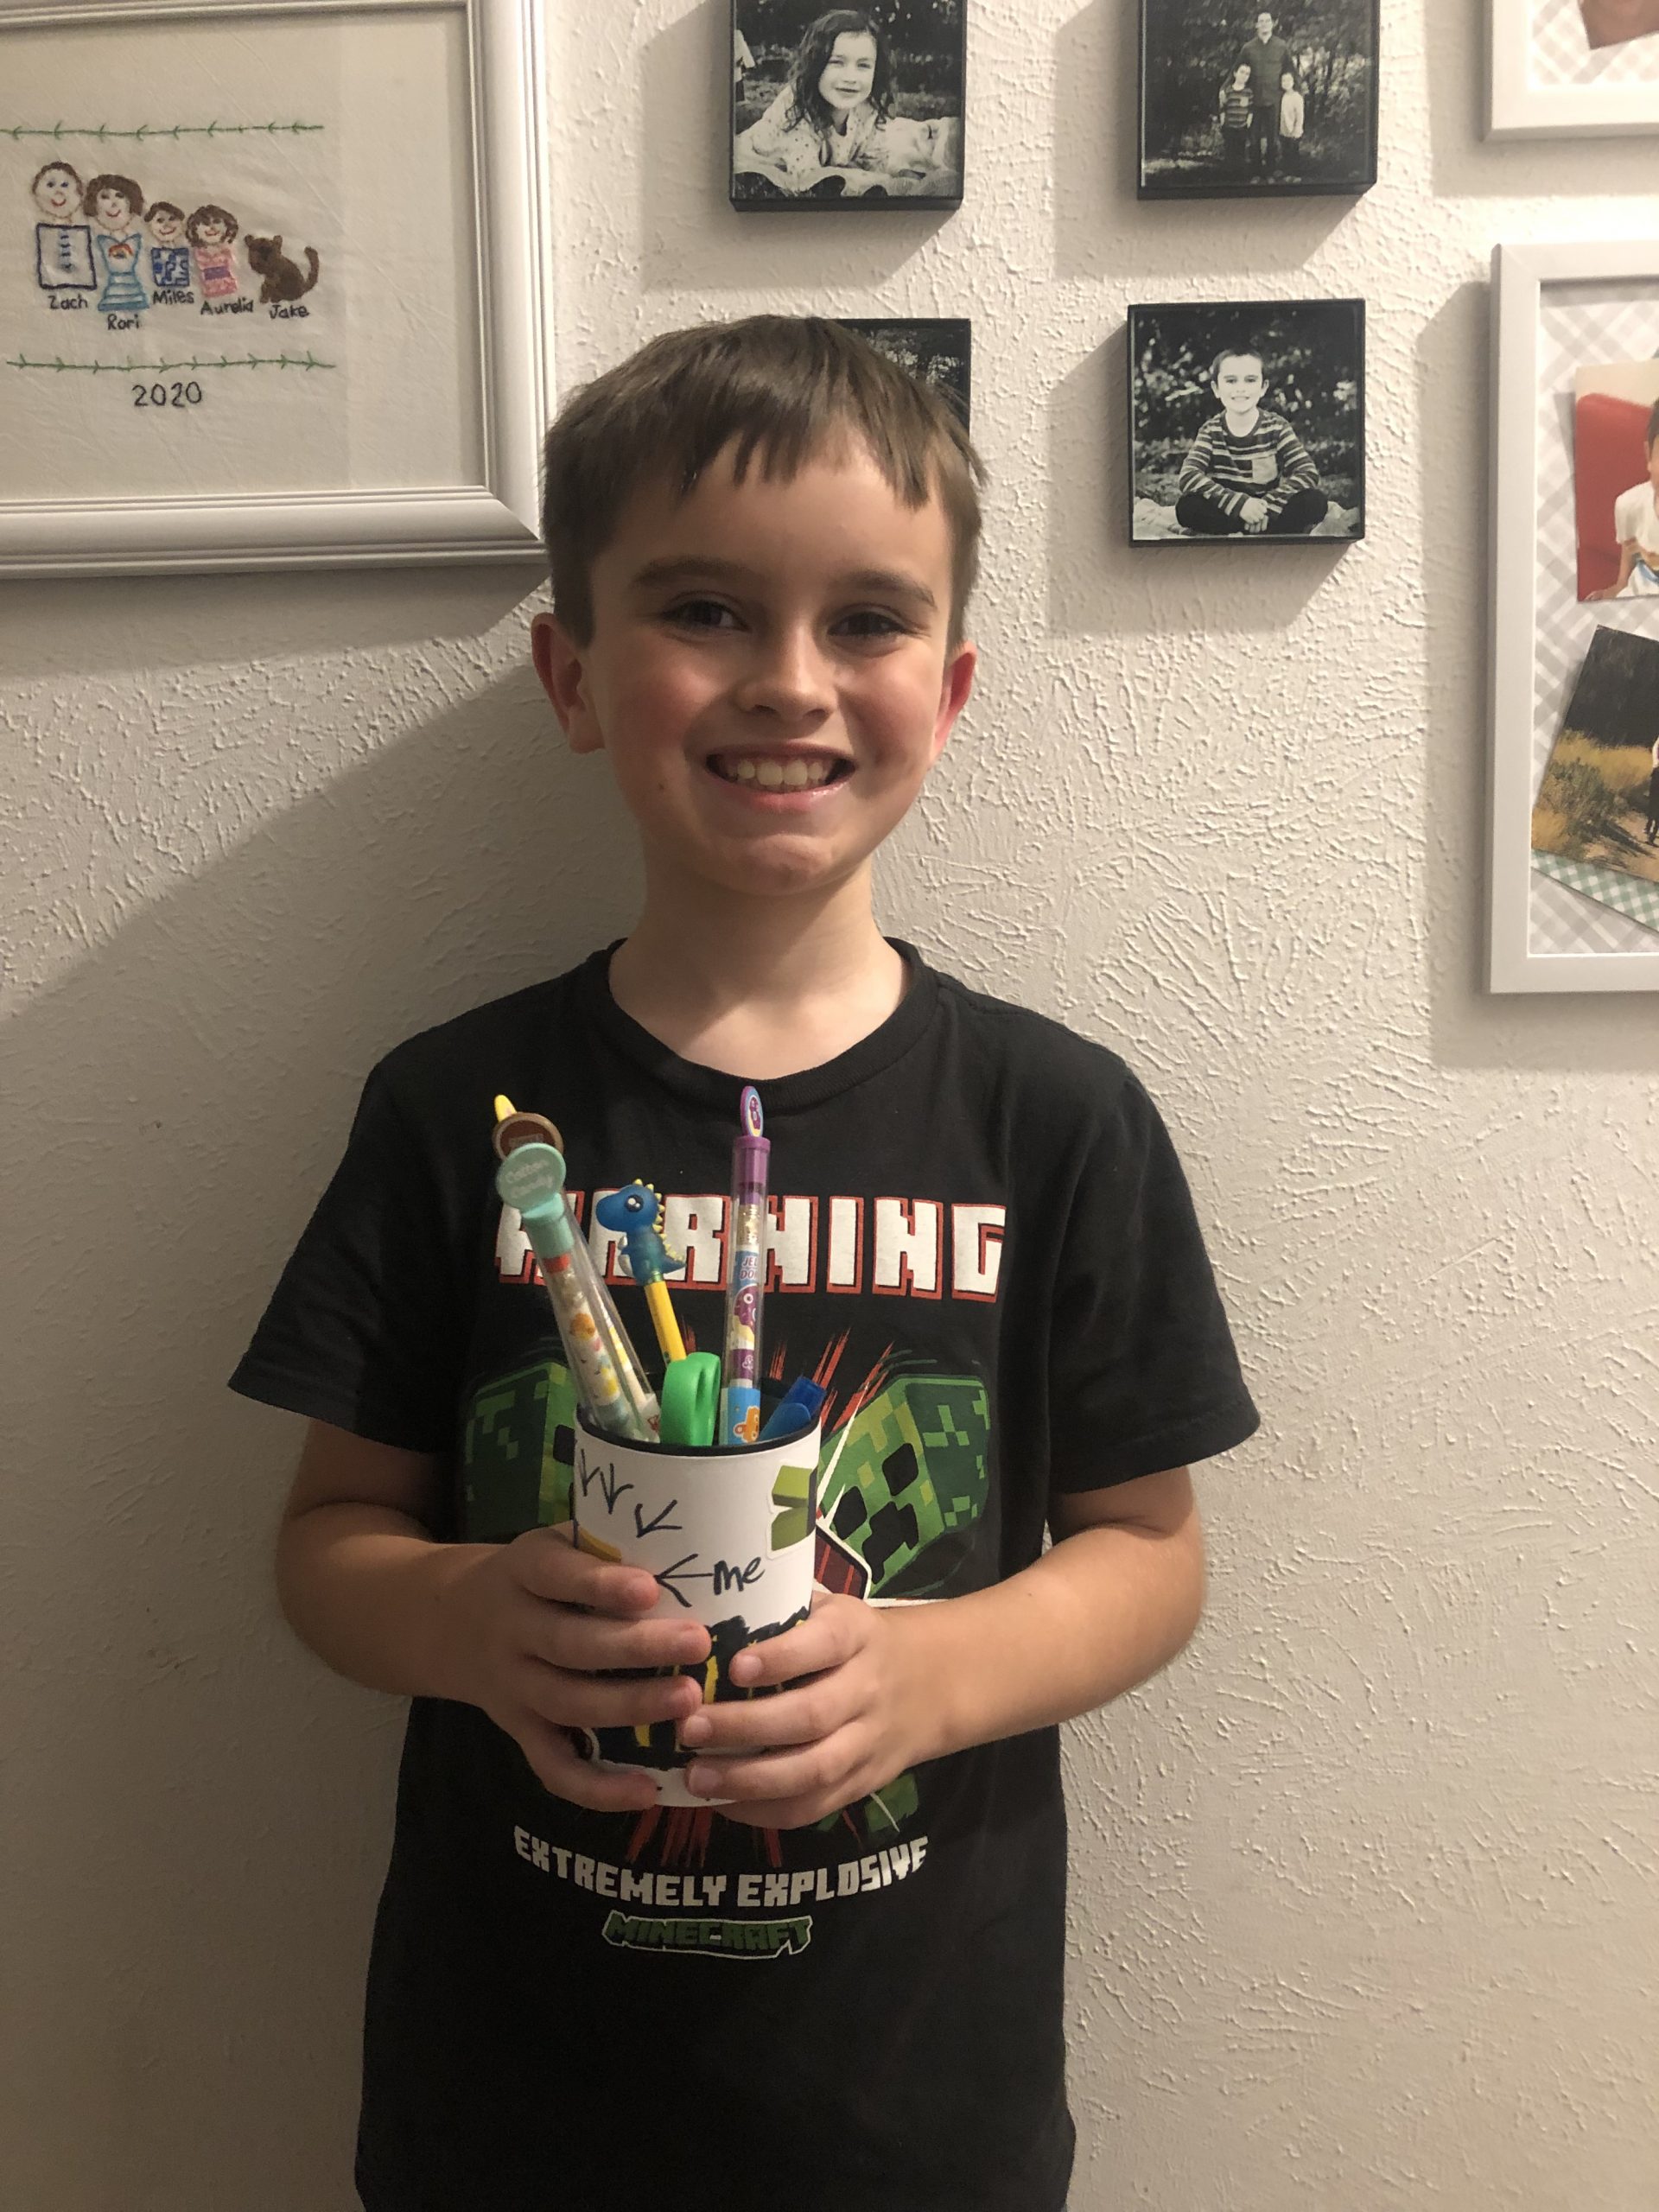
Pro tip: Encourage your kids to think about other creative ways they can use their personalized upcycled storage cans. The kids loved this project, and my son was already planning new projects for future cans before I had a chance to bring it up. He’s ready to create planters with some, and my daughter wants to make a whole row to store her small Roblox toys.
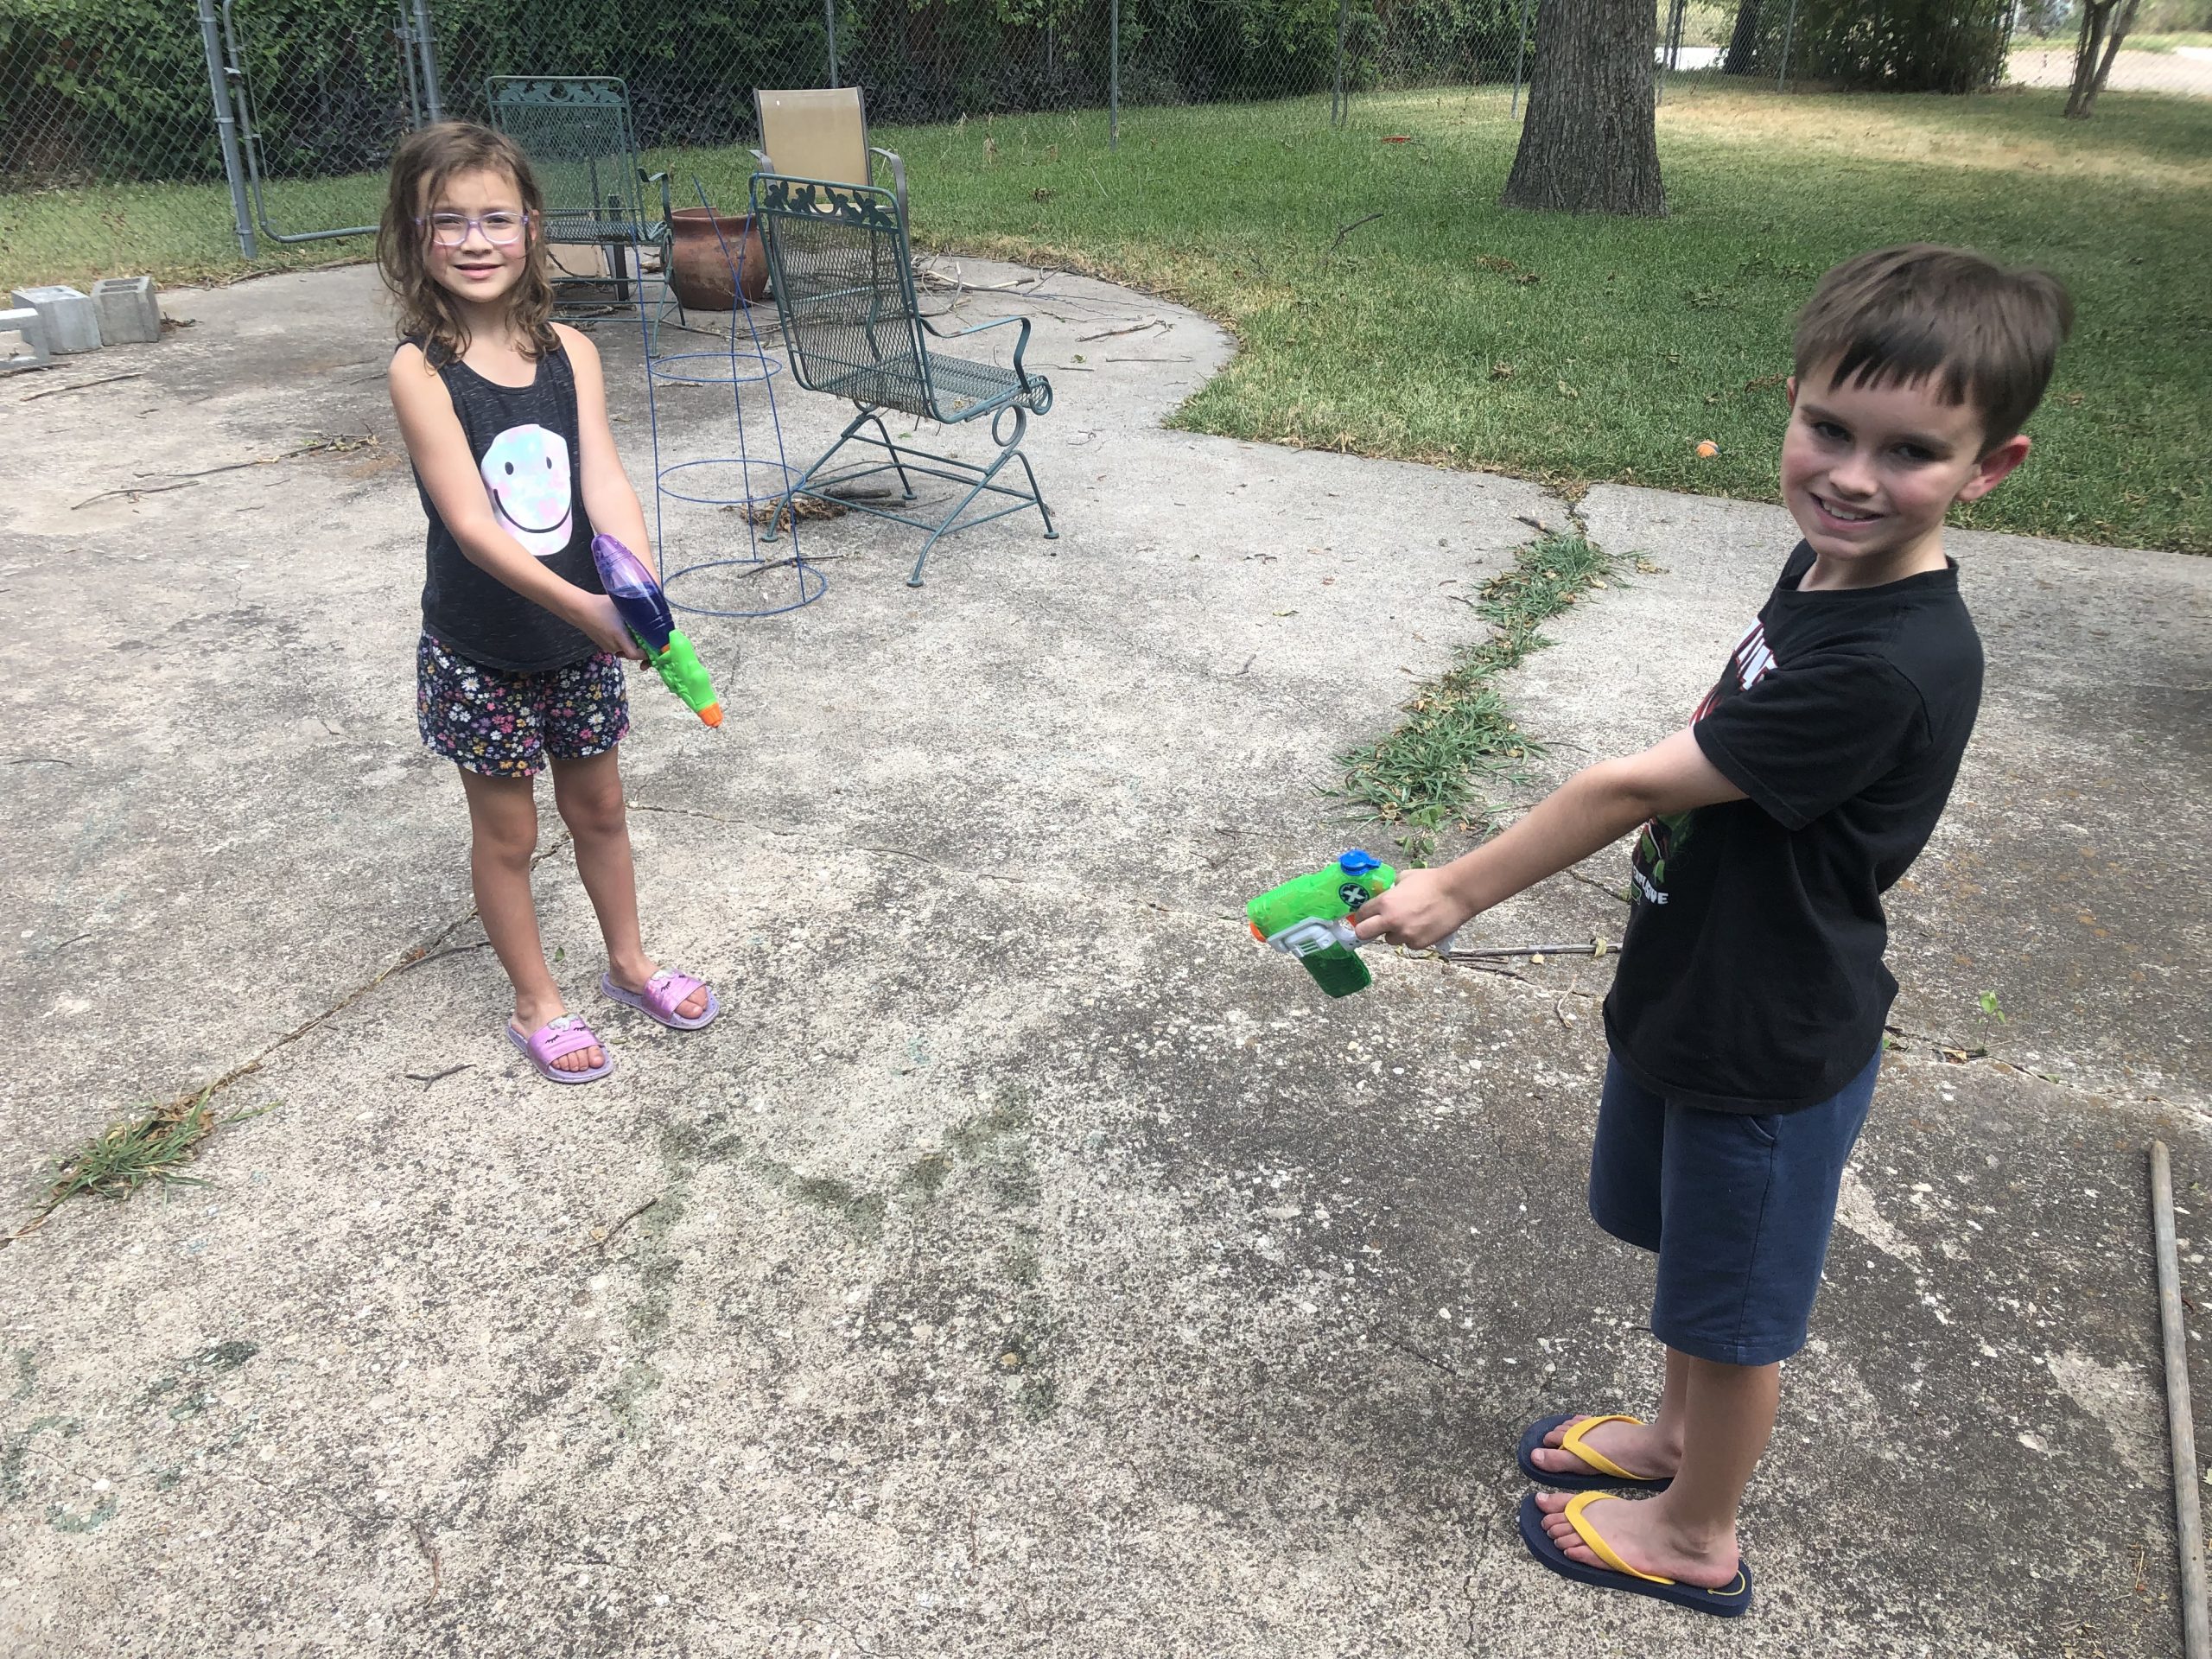
DIY Water Gun Paintings
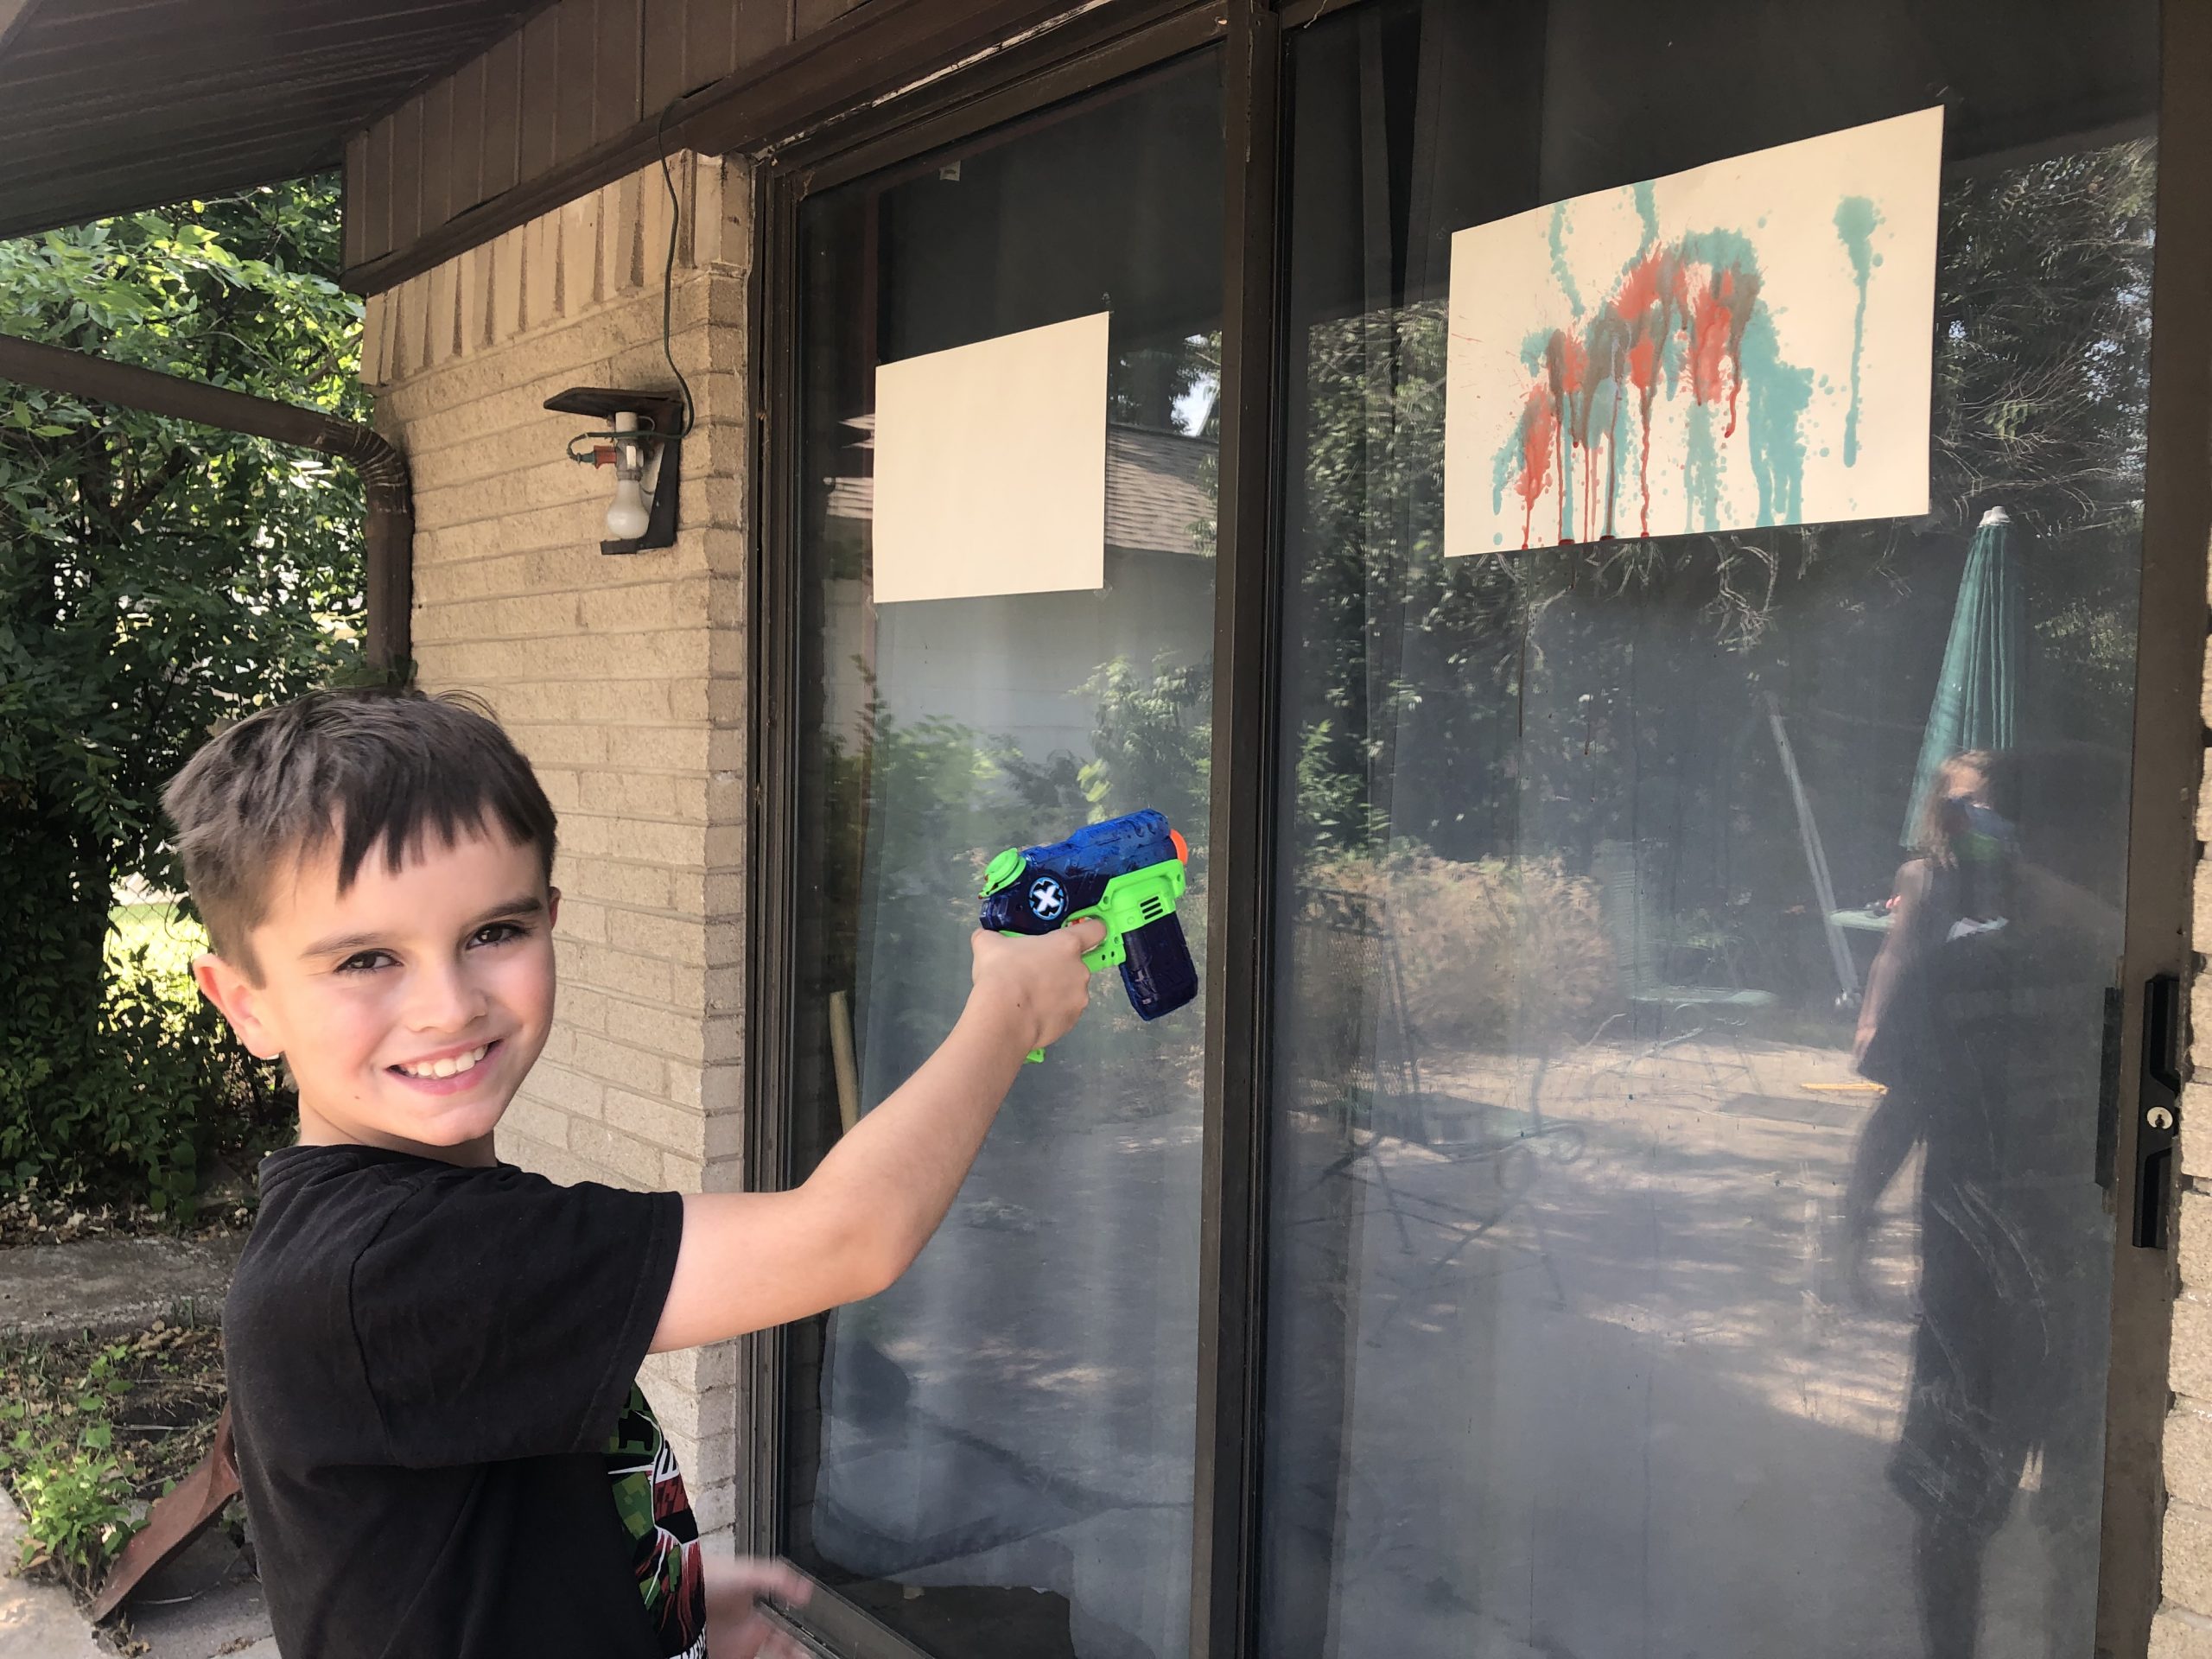
My children ask to paint a lot, and while I love their art, I don’t always love the cleanup. This project is more appealing for me because it happens outside, and they love the novelty of using their water guns to create artwork.
Supplies
- water guns
- food coloring
- water
- paper or canvas
Directions
Add a couple teaspoons of food coloring to a water pistol. Fill with water and shake well. Do a quick test to see whether you want to add more food coloring before you start.
Place your canvas or paper either on the ground, clipped to a fence, or taped to a back door or window. Let the kids choose their colors and create special artwork just for their rooms. This is also a really fun way to create colorful DIY gift wrap using butcher paper. We used the remaining water paint to create artwork on the sidewalk and patio.
You can add stencils to the paper or write on it with a white crayon first for extra fun. If you’re using canvas, you can place painter’s tape to write your child’s name or initials before they spray.
Pro tip: This is obviously an outdoor art project. I highly recommend saving it for just before shower or bath time.
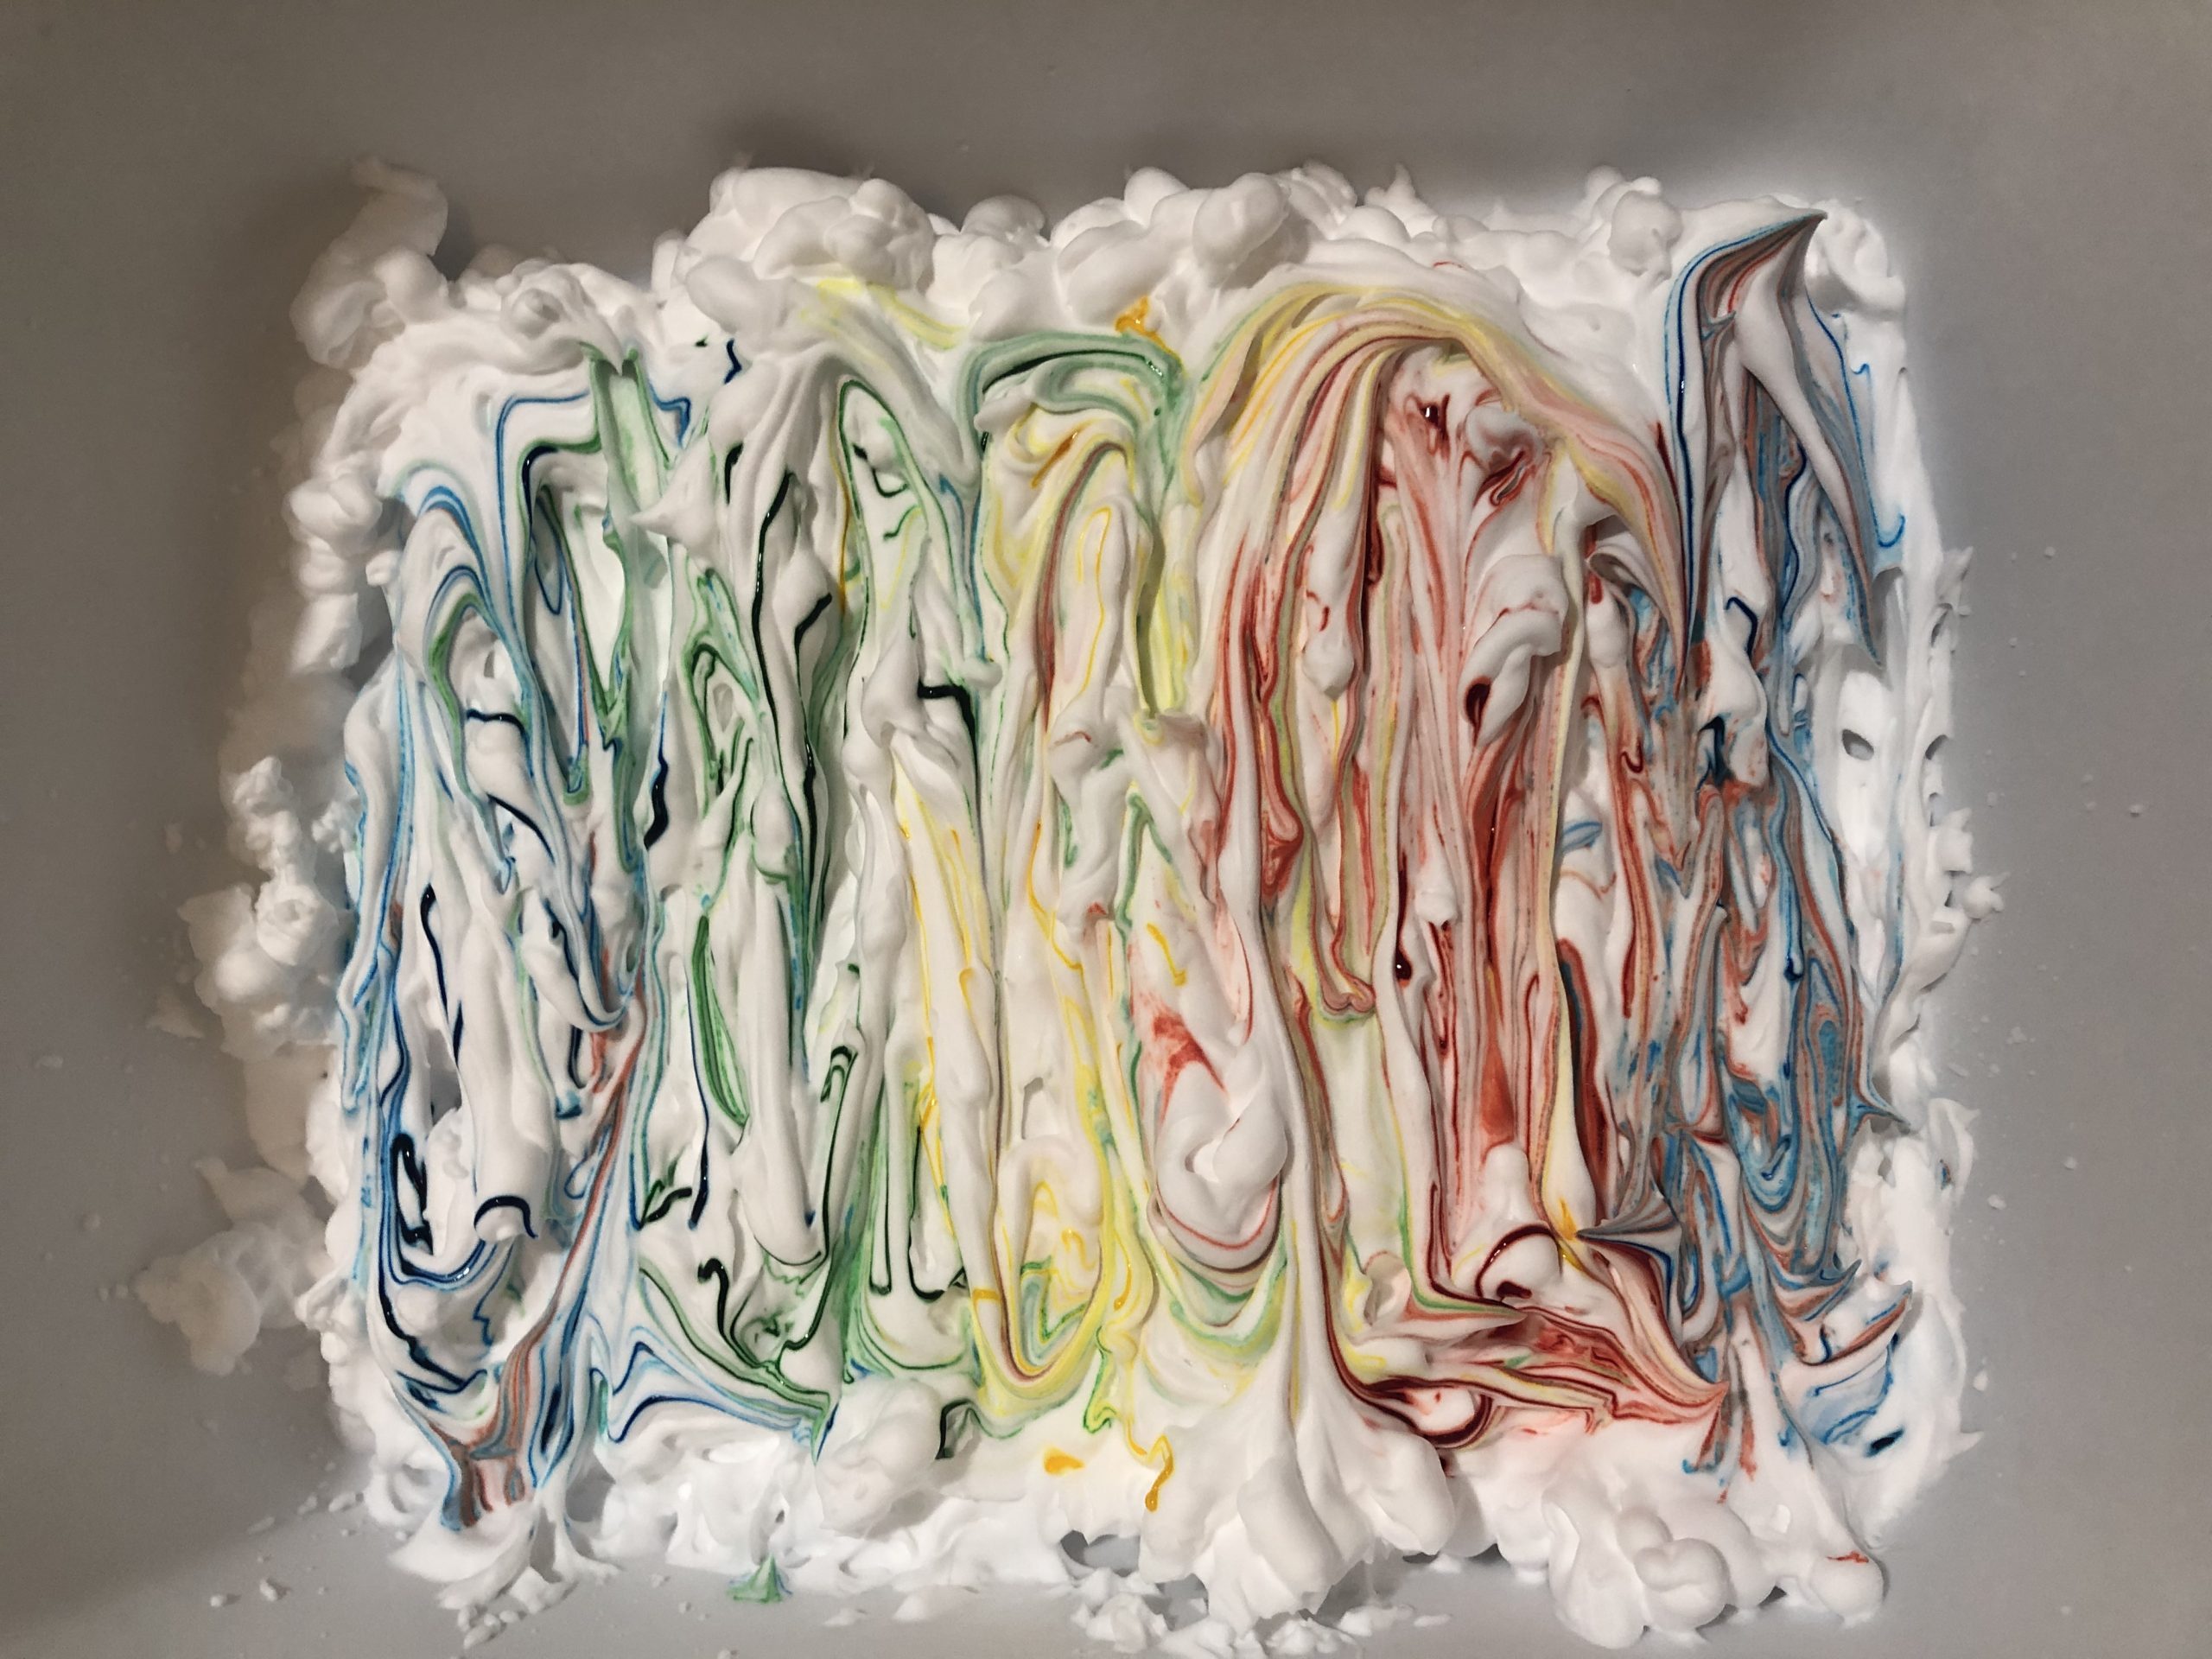
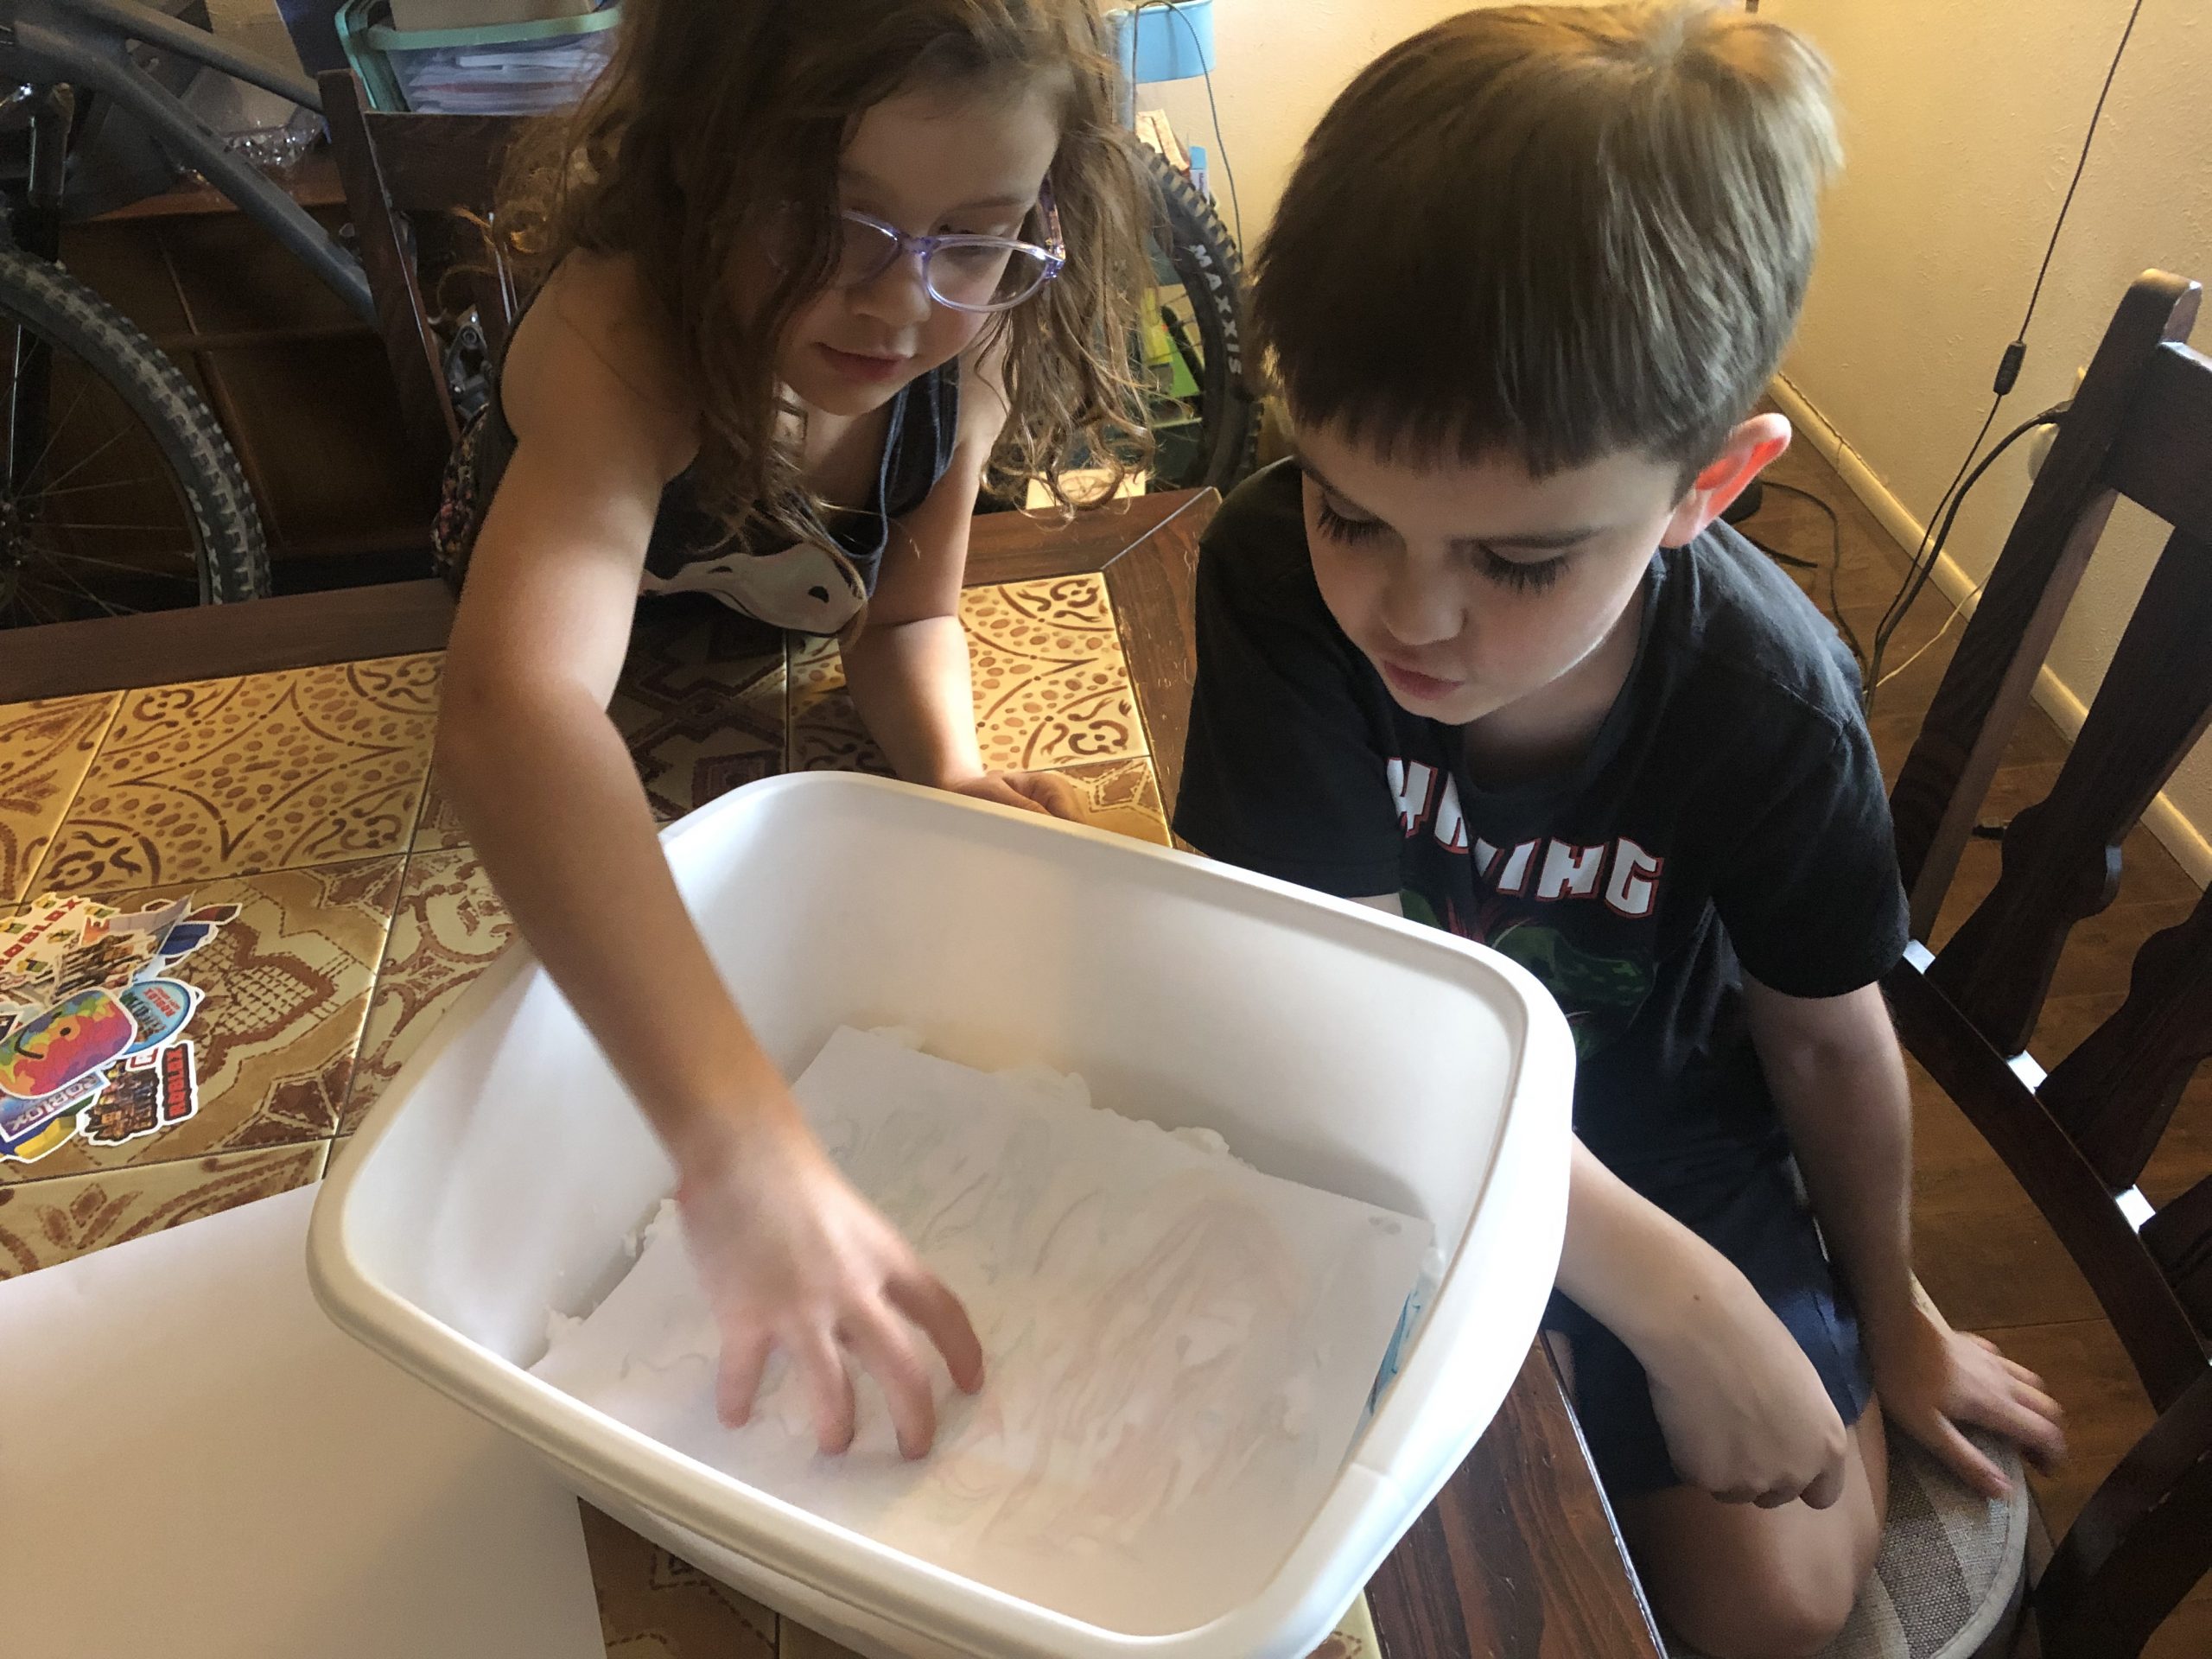
Shaving Cream Marbling
So, the truth is, I really wanted to do this one and decided the kids would probably enjoy it, too. I’ve seen it on Pinterest a few times but hadn’t ever tried it. I was honestly skeptical about how it would work out, but it was super fun and cleanup was easy.
Supplies
- shaving cream
- food coloring
- baking dish or plastic tub
- plastic ruler or squeegee
- paper (thicker paper, such as card stock will work better than printer paper)
- toothpick or pencil
Directions
We used a plastic tub, but a baking dish would work, too. Put a layer of shaving cream in the container and add drops of food coloring. We used a pencil to stir the colors around a bit. Not too much! Then carefully lay the paper on top. Pat gently to get coverage across the page. Gently remove the paper. Use a squeegee if you have one, or a plastic ruler, to gently scrape away the shaving cream and reveal your beautiful marbled work.
I’ve seen people make stationery and notecards using this method, which is really fun. We hung up our favorite piece once we were done. I’m excited to try this one again. It’s a great project for indoors or outdoors as long as you have a flat surface available for scraping away the shaving cream. We did this at the dining table and a quick wipe with a washcloth cleaned everything up easily.

Pro tip: We learned as we went along with this one. Copy paper doesn’t hold up very well against the wetness of the shaving cream. The scraping took some paper with it on our first couple tries. Card stock was much better, and we had a few plain paper coasters that did well, too.
What creative projects are your children excited about lately?
Read More: 20 Indoor Crafts and Activities for Kids


